Add an AI Assistant to Your Website in Five Minutes
In just 5 minutes, add an AI Assistant to your website with AID to achieve 7x24 customer service, enhance user experience, and boost business competitiveness.
Overview of the Solution
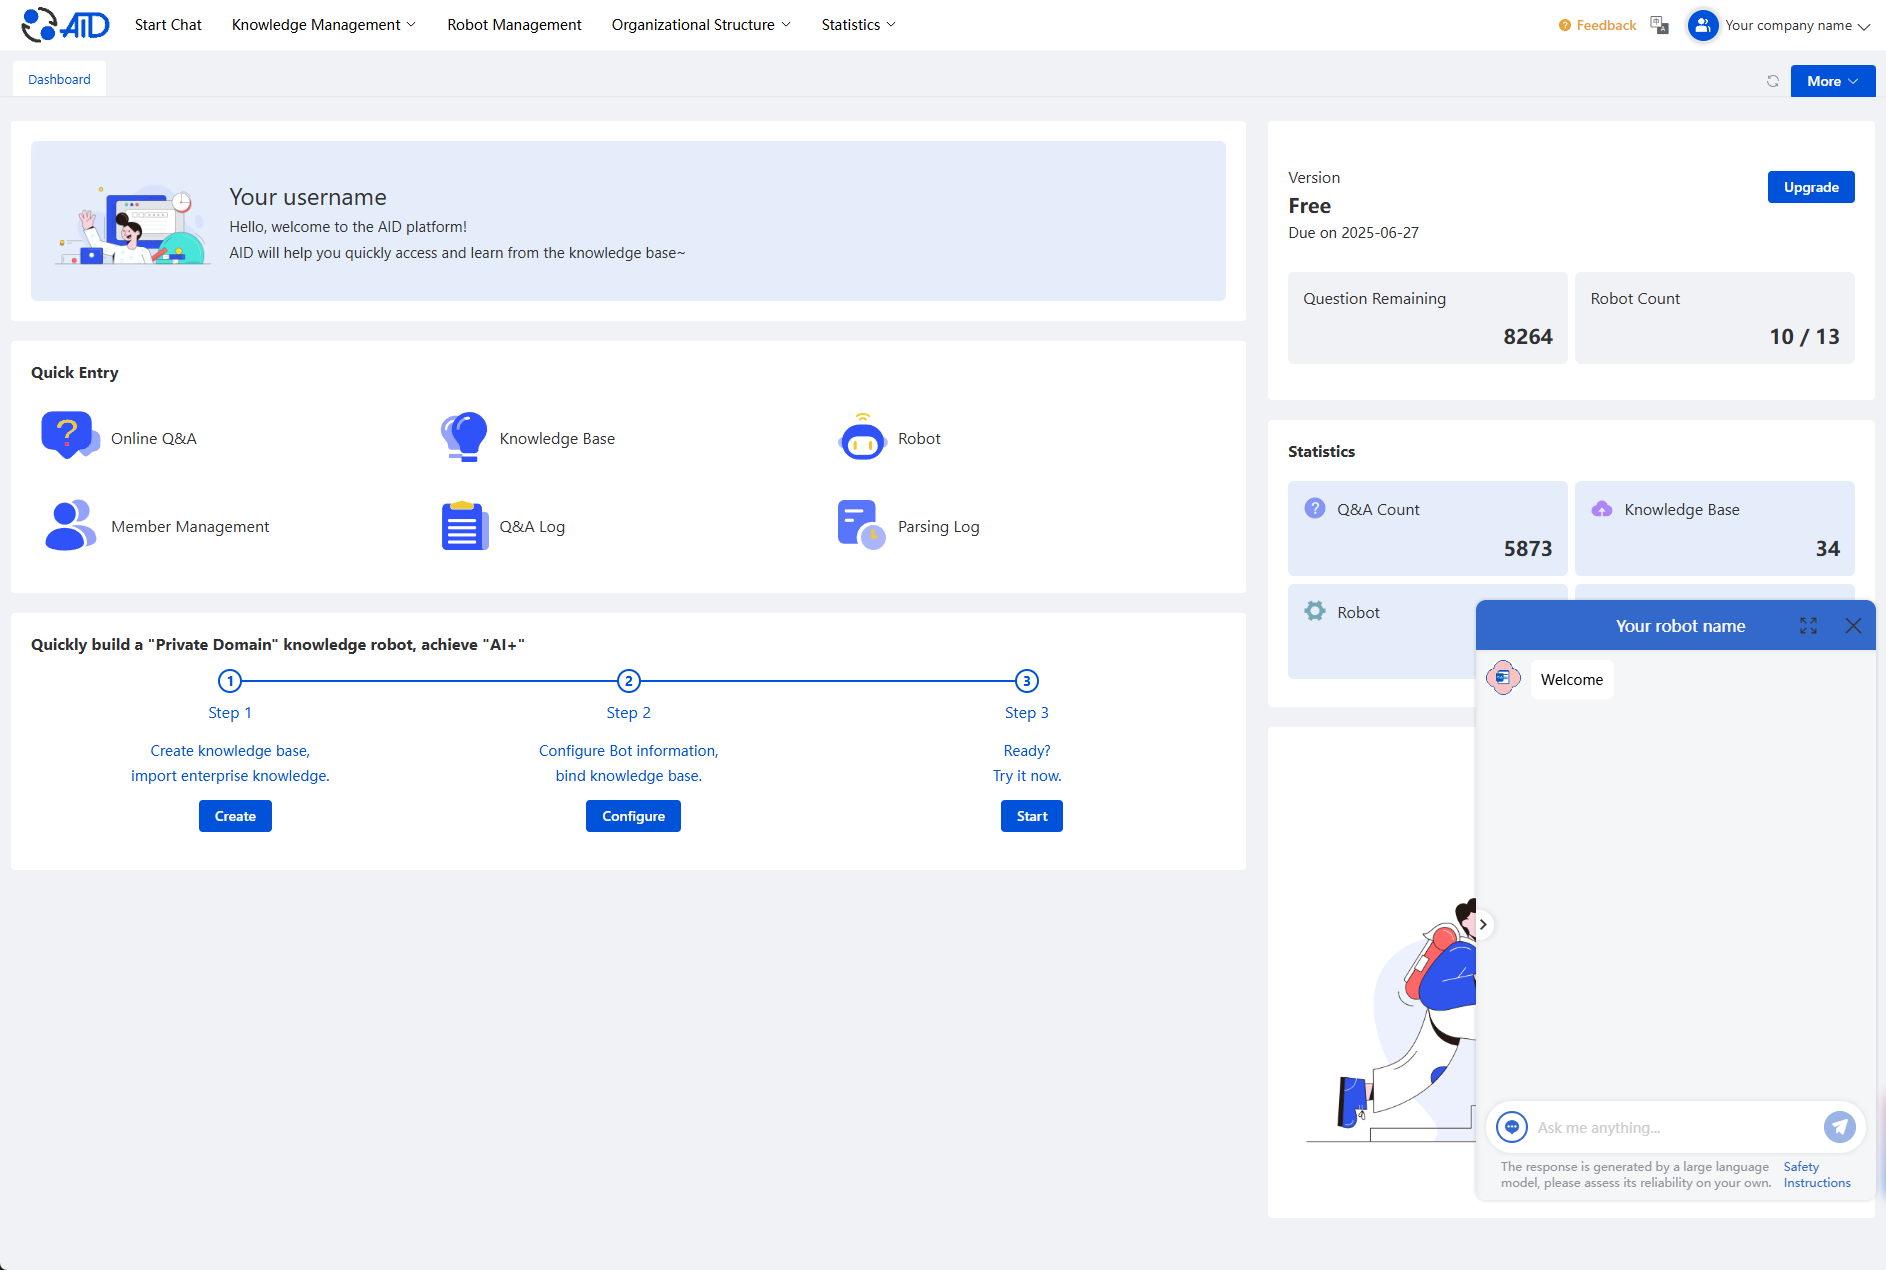
Easily add an AI Assistant to your website with 5 simple steps:
Build a Knowledge Base: Organize some common Q&A, such as website URLs, documents, FAQs, etc., to enable the AI Assistant to assist you in customer service more intelligently.
Quickly Create a Chatbot: It's like adding a new member to your website.
Connect the Knowledge Base: Inform the chatbot which knowledge base to use to provide accurate information.
Copy the Embed Code: It's as simple as copy and paste.
Insert the SDK Script into Your Website: This will enable the AI Assistant to work on your website.
1. Creating a Knowledge Base
Follow these steps to quickly create a knowledge base
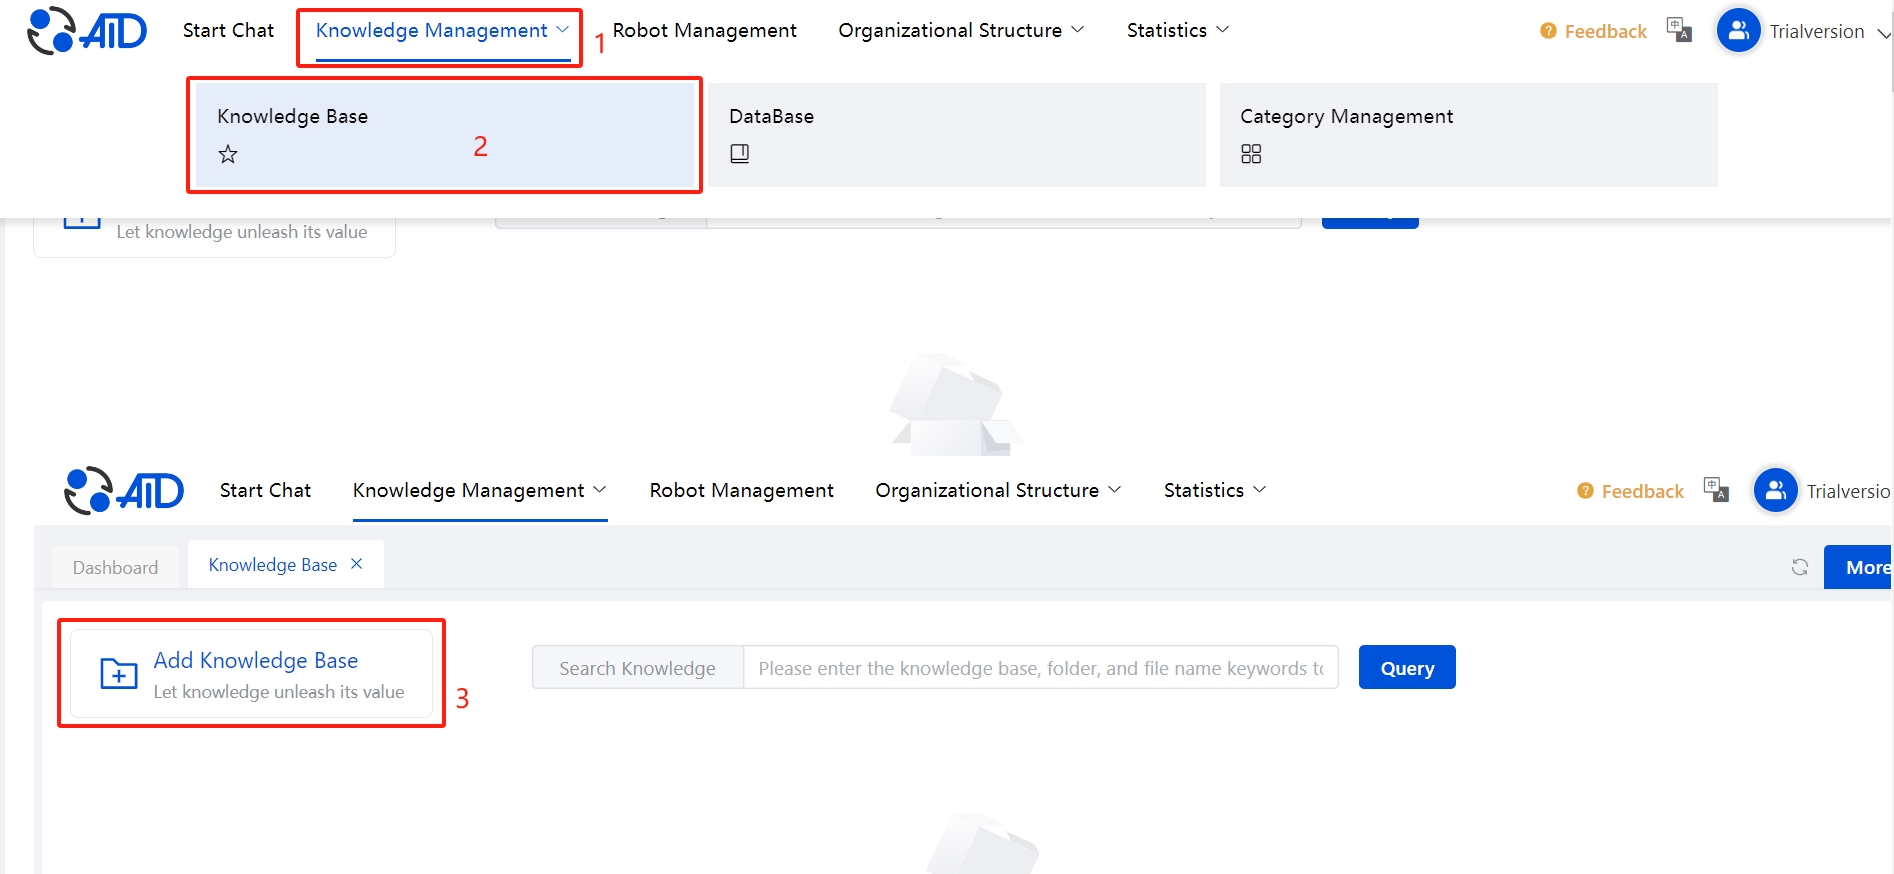
1.1 Create a Folder
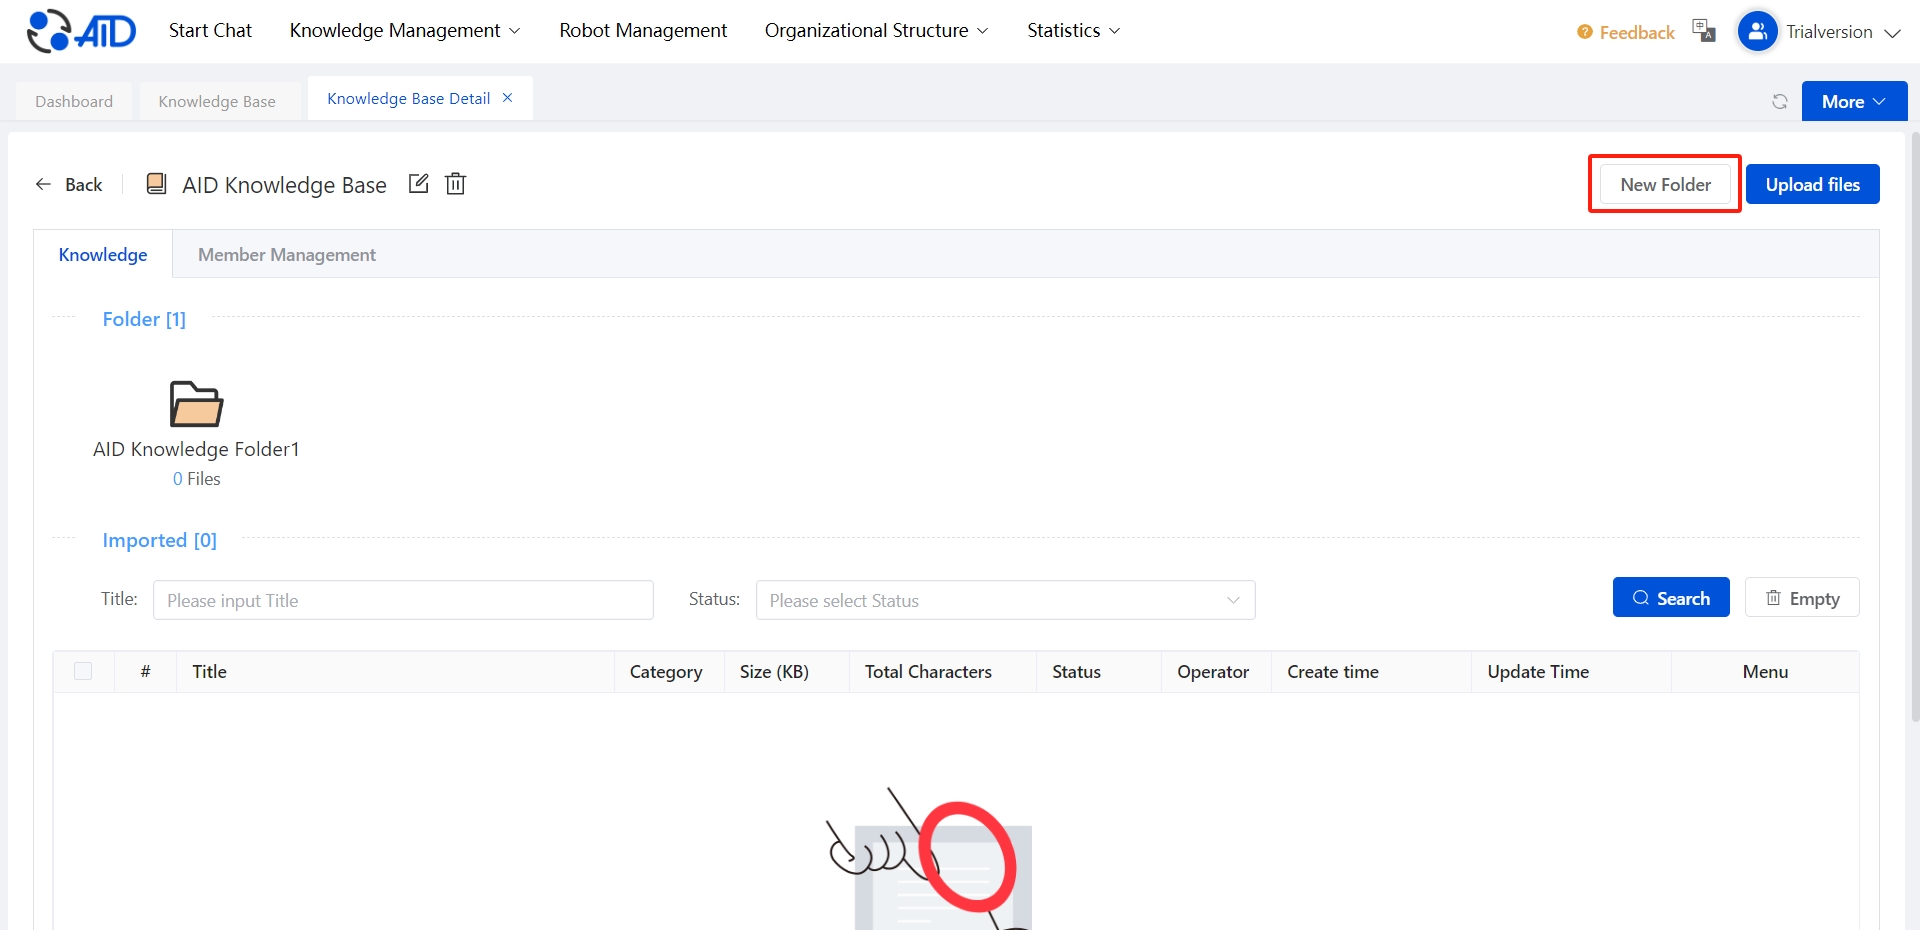
Create a folder by clicking the [New Folder] button in the upper right corner of the knowledge base page and entering the folder name.
1.2 Upload Files
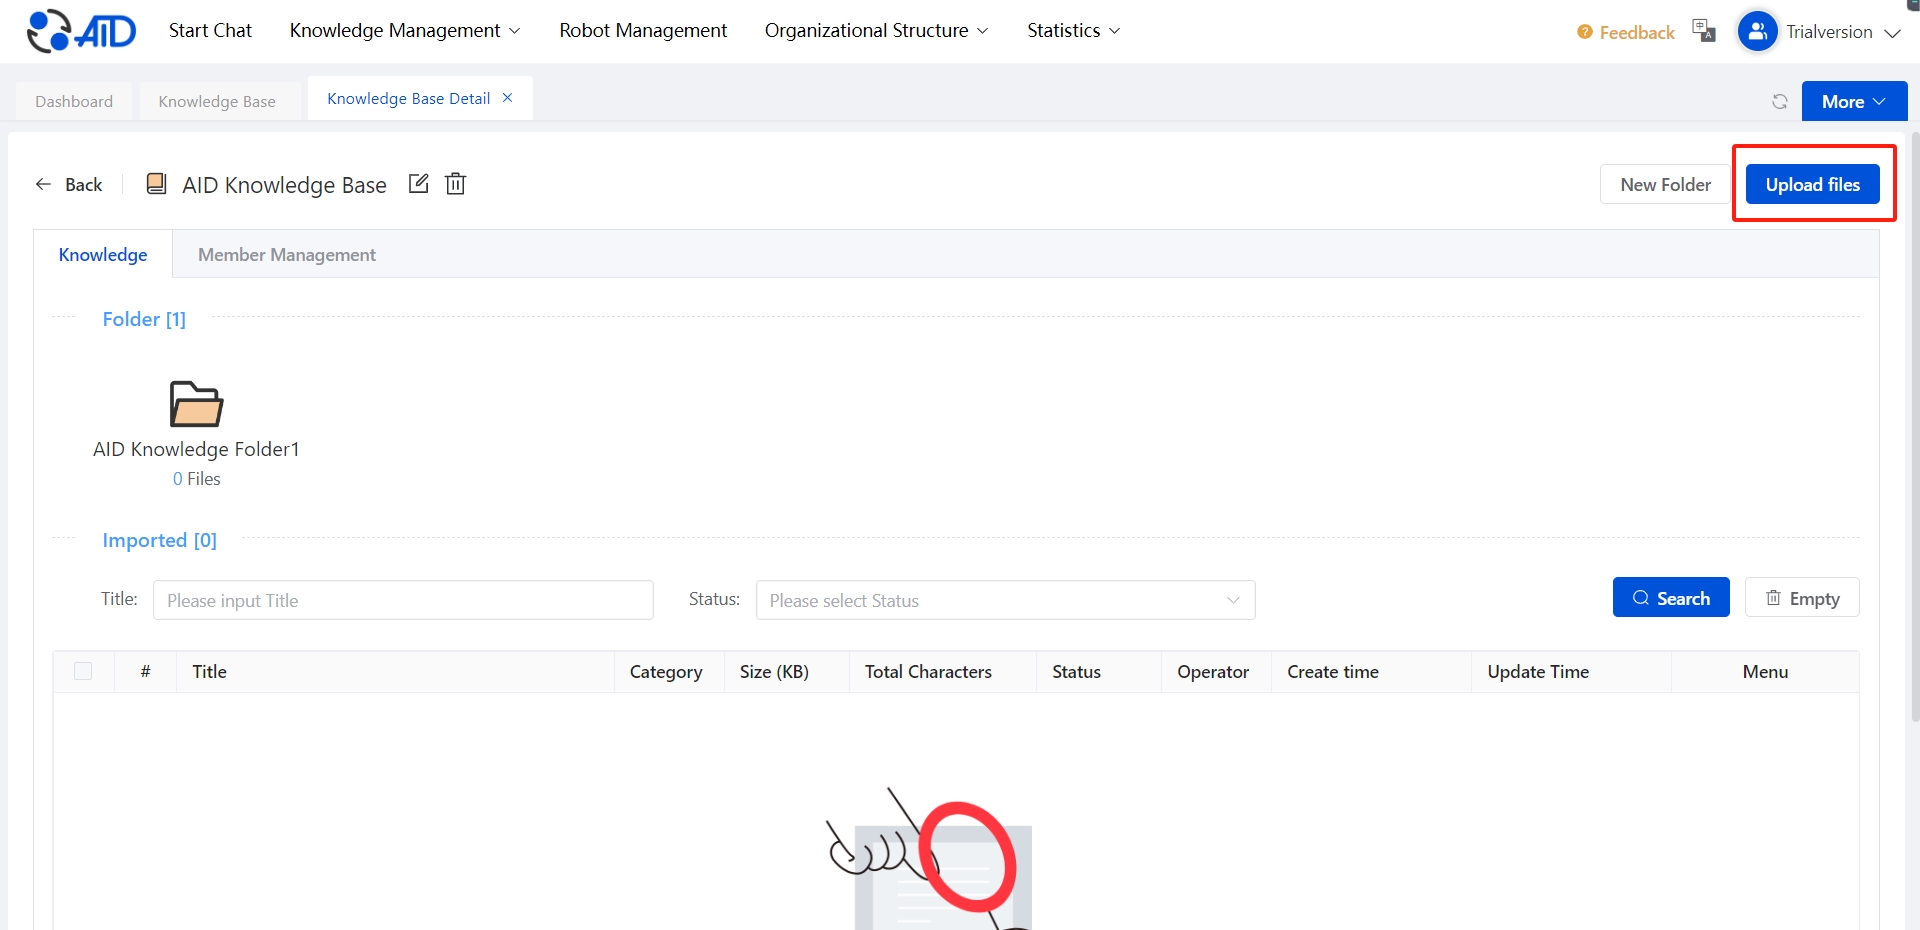
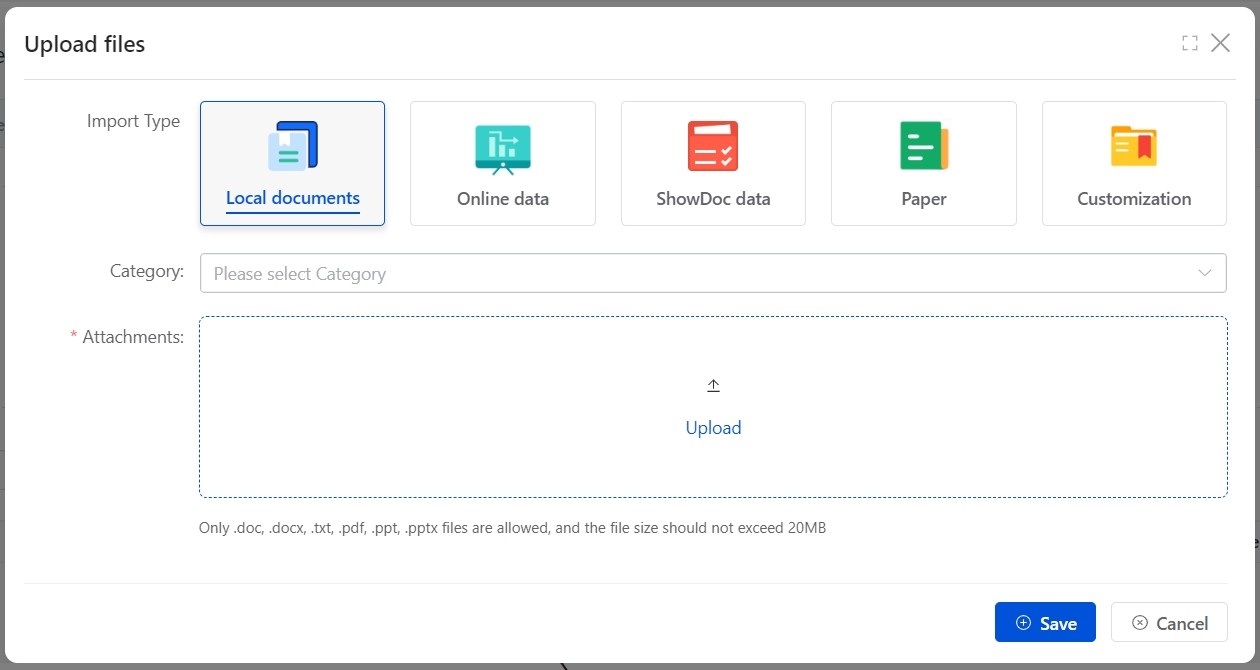
Simple Upload to the Knowledge Base: On the knowledge base page, you can easily upload files.
Adding content to the knowledge base is simple and currently supports the following five methods:
Document Upload: Directly select files to upload.
URL Import: Just paste the web page link, and the AI knowledge base will automatically grab the content.
ShowDoc Import: If you're using ShowDoc, simply enter the ShowDoc address and the starting page number you want to import. One-click import, easy done!
Paper Upload: Designed for papers, supports PDF files with a left-right layout, making upload a breeze.
Custom Upload: Want to manually input knowledge? No problem, just type in the content here to upload. A few simple steps to enrich your AI knowledge base.
-
Please avoid uploading PDF or PPT files that are purely images.
-
After uploading, the system may need some time to vectorize and parse the files.
1.3 Member Settings
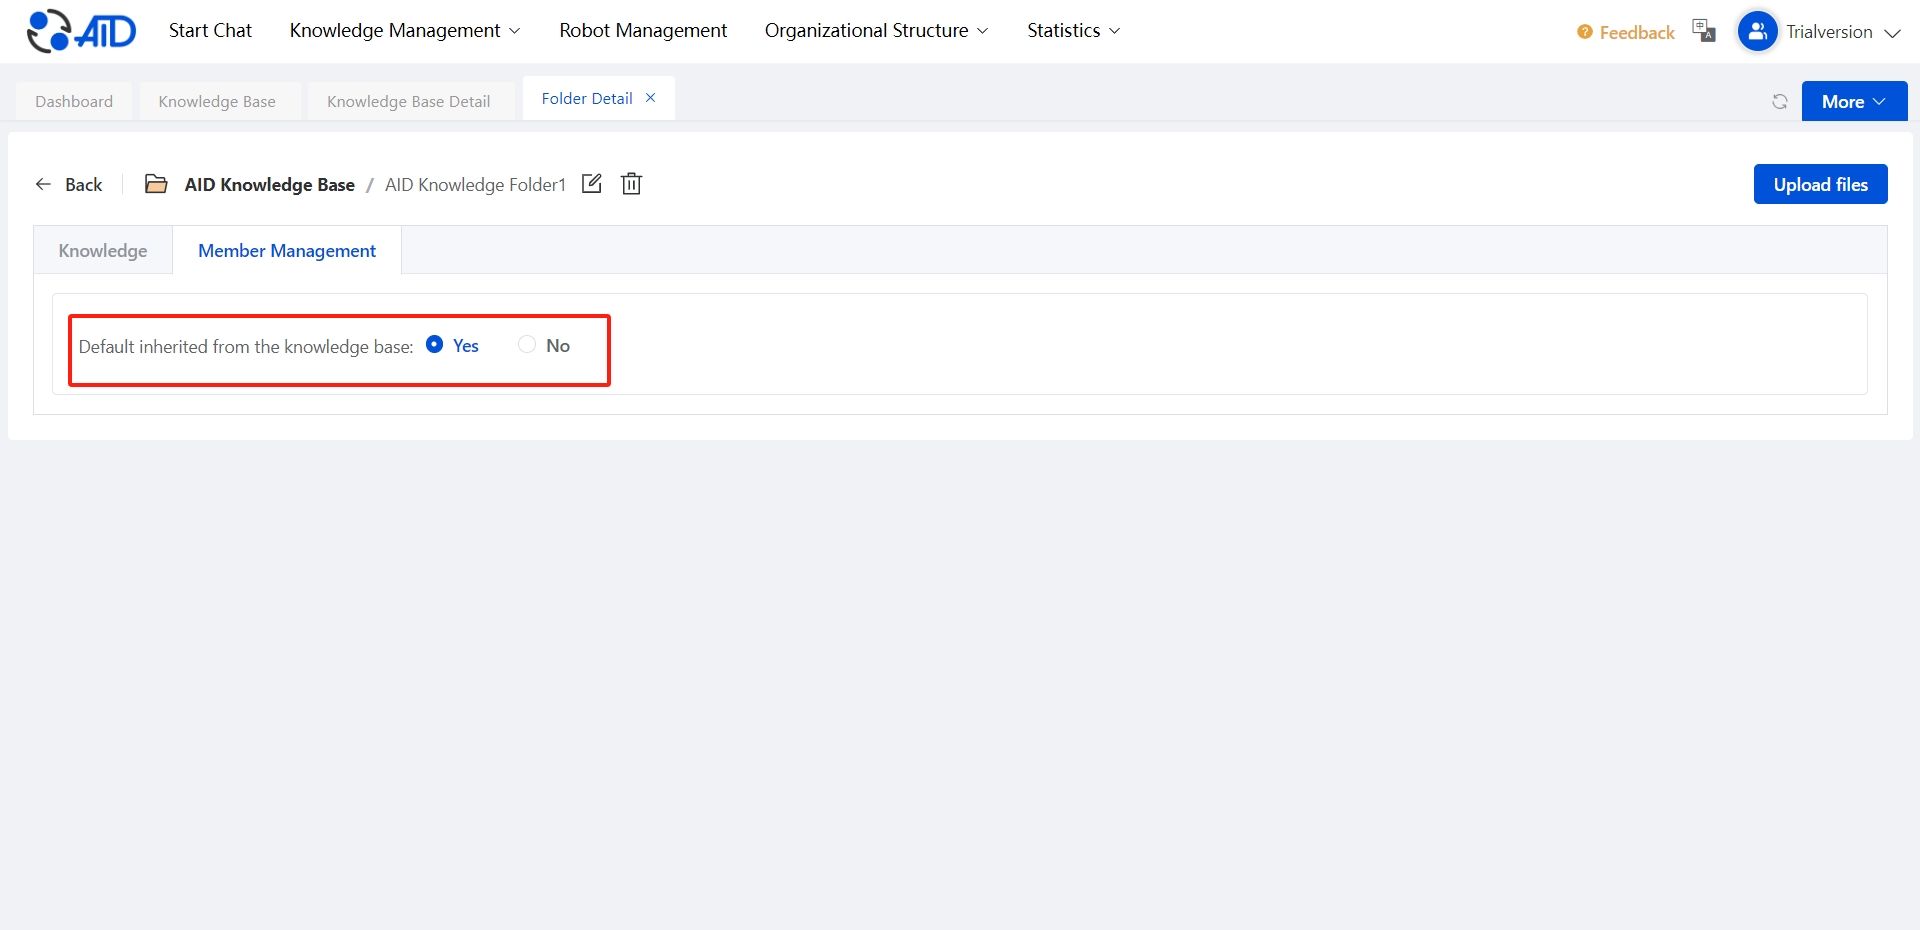
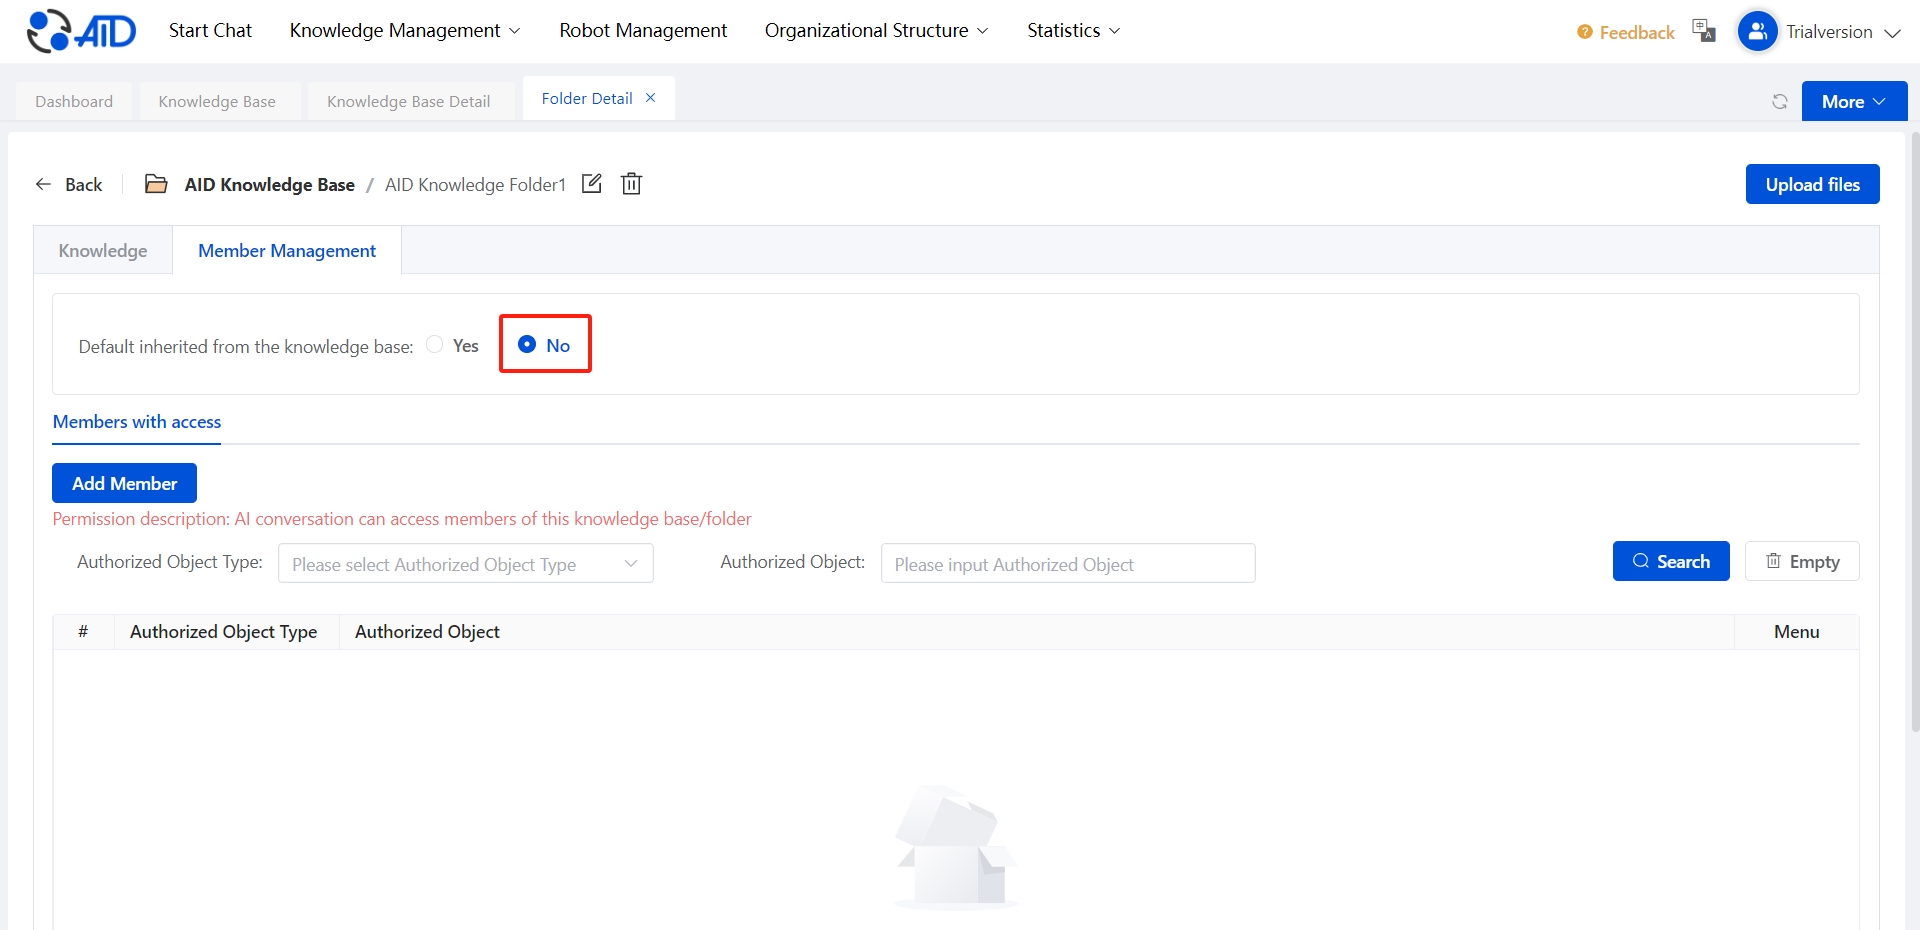
By default, the permissions of a folder inherit from the parent knowledge base. However, if needed, you can adjust the folder access permissions settings with the following button.
2. Create a Chatbot
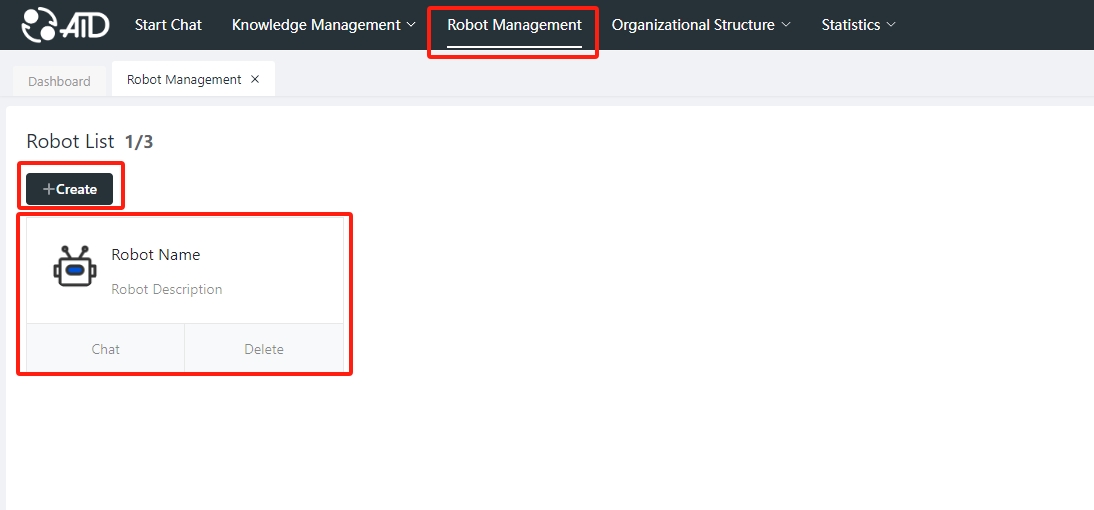
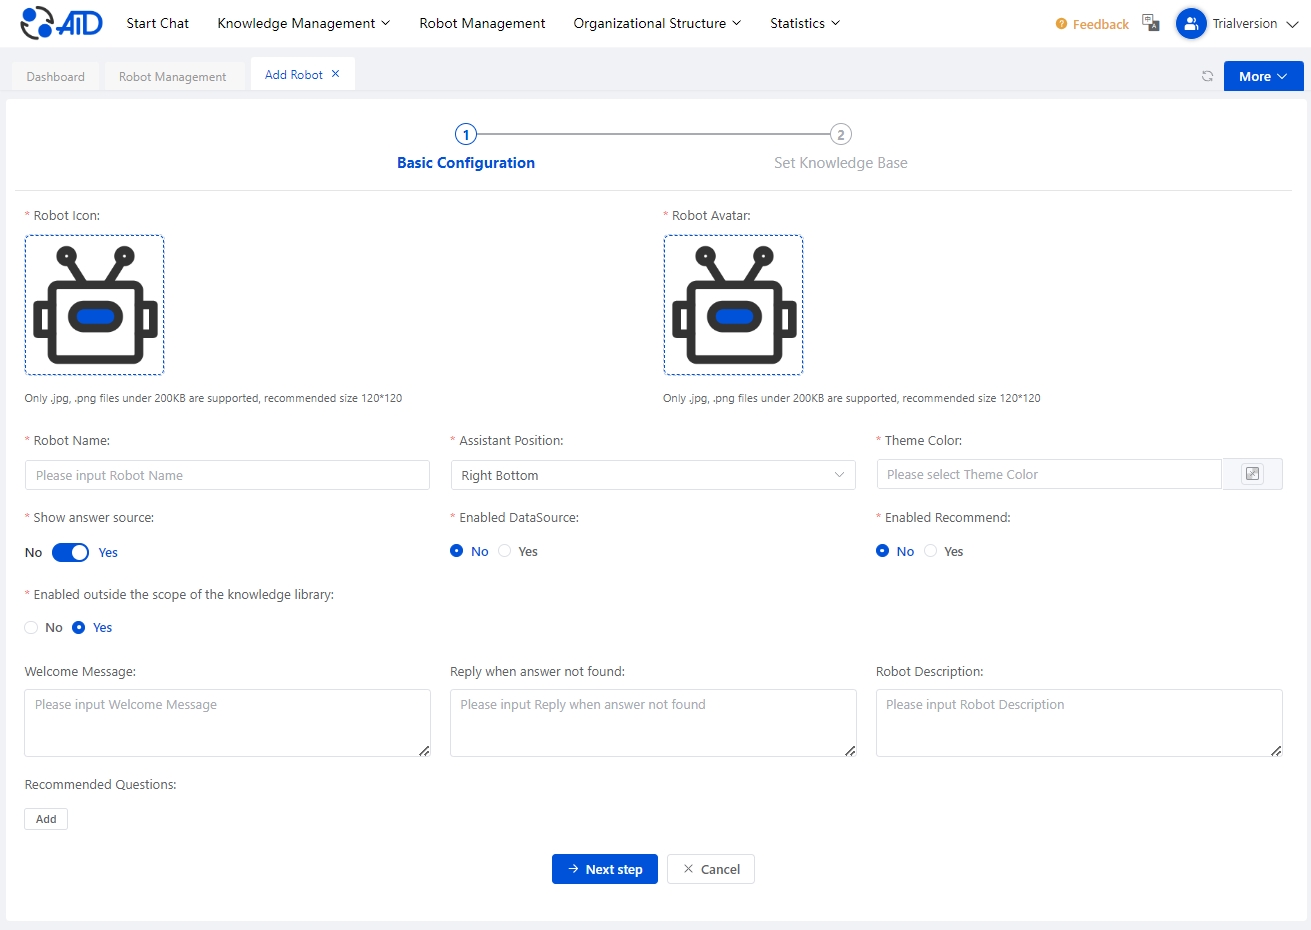
Access the [Chatbot Management] feature with an easy two-step operation: first, click [Chatbot Management] in the navigation menu at the top of the website, then select [Chatbot] from the quick access page entry. In the management interface, click the "+ Create Chatbot" button to start your AI chatbot configuration journey.
Customize Your AI Chatbot:
- Give your AI Assistant a catchy name;
- Upload unique chatbot icons and avatars to enhance recognition;
- Choose the chatbot's theme color to highlight your brand;
- Also, don't forget to write a chatbot description and set up popular recommended questions to improve the interactive experience.
3. Connecting the Knowledge Base
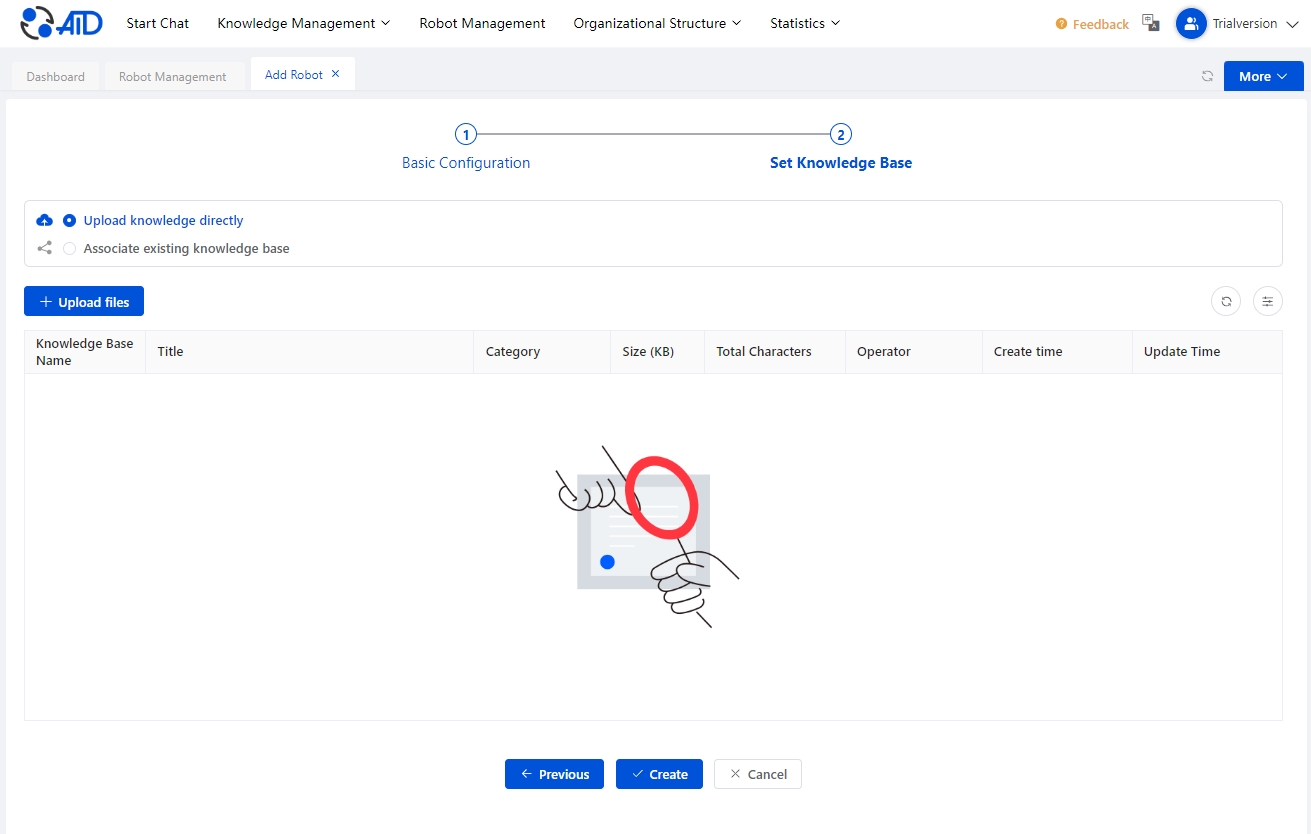
Following the previous steps, you now have an AI Assistant ready to interact with your customers. To ensure that your AI Assistant provides precise and professional answers just like a member of your corporate team, the next step is crucial – configuring a comprehensive knowledge base for your chatbot.
On the create/edit chatbot page, click the "Set Knowledge Base" tab to define the scope of the knowledge base.
- You can choose to directly upload knowledge, and the system will create a default knowledge base based on the chatbot's name.
- You can also choose to associate an existing knowledge base; by default, the chatbot's knowledge base includes all content under the organization.
- Alternatively, you can specify a particular knowledge base or folder for the chatbot, limiting the bot's knowledge scope to only the designated knowledge base and folder.
4. Copying the Code
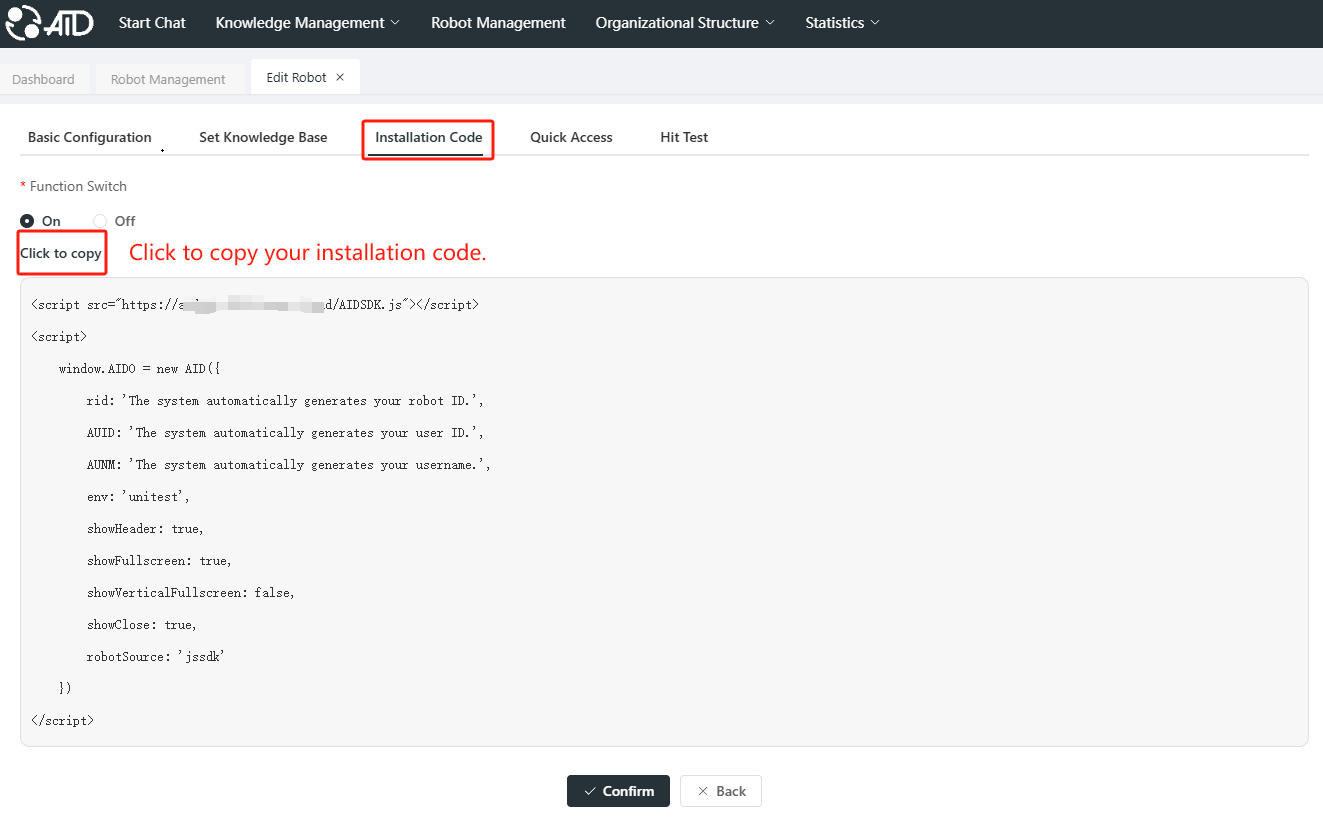
On the chatbot configuration details page, find the "Install Code" option and click on it. Then, with just a simple click on the "Copy" button, you'll have the installation code ready to use!
5. Embedding the Code
5.1 Placing the Code on Your Website
Place the copied code from the previous step into the appropriate location on your website's page, and your AI Assistant will be ready to serve you immediately! Easily achieve intelligent interaction without any technical skills required.
5.2 Effect Demonstration
Experience the Latest Charm of the AI Assistant: Upon revisiting our sample website page, you'll be delighted to discover a cute AI Assistant icon in the bottom right corner of the site. With a gentle tap, you can instantly activate it and enjoy the fun of intelligent interaction. Explore new website features, the AI Assistant is always on standby!

Summary
Through the above steps, you can easily integrate the AI Assistant into your website or application, allowing users to enjoy smart and convenient services. Want to learn more details? Please refer to the Official Integration Guide, and you'll have everything under control!